

What are Event Bubbling, Event Capturing and Event Propagation and how to use them
Event Propagation
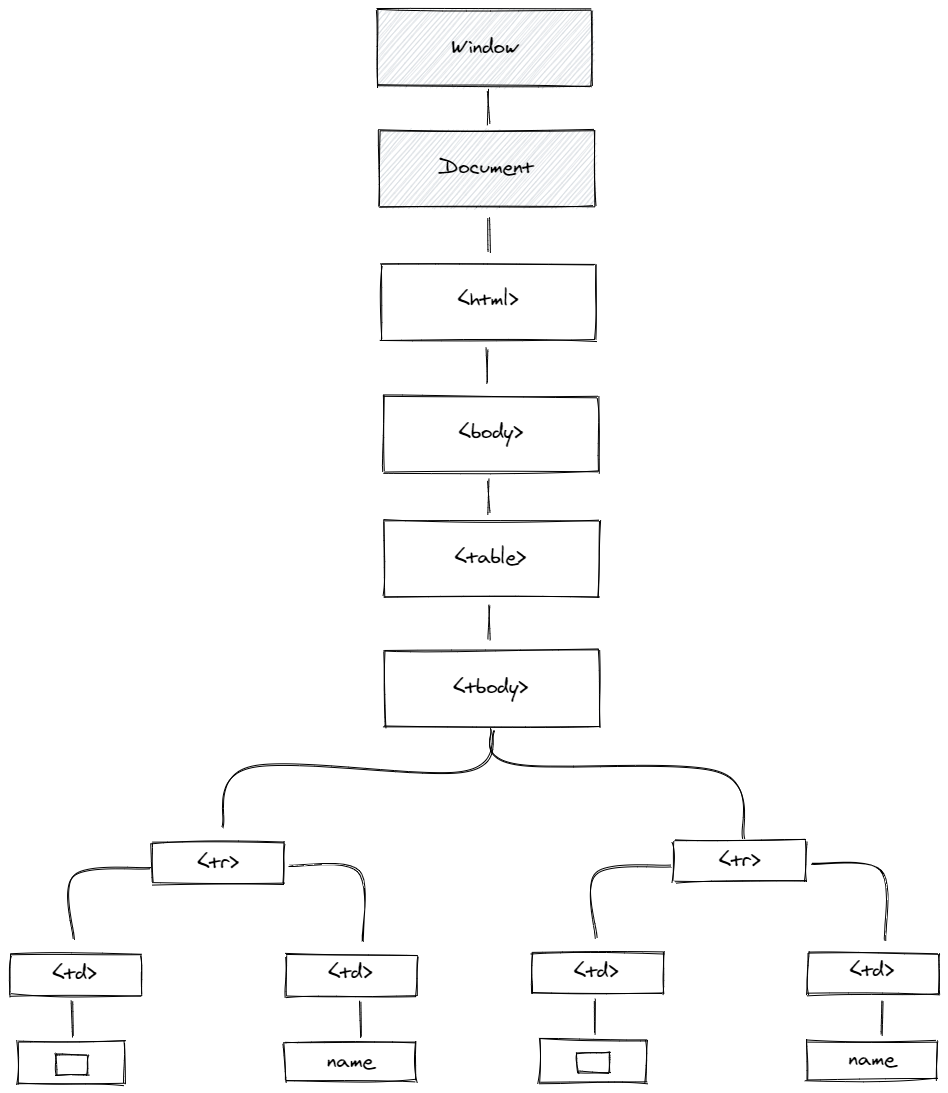
Event Propagation is a behavior of events in Javascript. Propagation means spreading in English dictionary, and that's exactly what Event Propagation is doing, it's spreading events through elements above itself in a hierarchy. That spreading happens in three phases, the first phase is Capturing, the second is Target and the last one is Bubbling. We will go into detail about what these are. Capturing is when we go from the top of our window object to the target, which in our case is the "td" element then we go from that target back to the top of our window object. I should also mention that if you need to stop the propagation of the event, and want it to fire only on the current element, you can use stopPropagation(). This will stop the event on the current element we clicked and won't spread on the higher elements.
NOTE: Very important to know that not all events have propagation on them, for example, blur, focus and scroll don't have propagations. They don't spread to parents, grandparents, etc. Also, Event Propagation is sometimes referred to as Event Delegation which is the same, just has a different name.
Below is an animation showing Event Propagation using bubbling:

Animation by Fatima Trtak
Here we have a "div" element and inside that element, we have a table with some rows. And those rows have a checkbox, if we click on that box, we will start propagations from that element. And any element that has event on itself will be executed, so it goes checkbox > td > tr > table > div > ... > window. This can be useful if we want to create an event on every row in the table, but don't want to manually add events for all of them individually, we can create an event on "table" and check which row was clicked and apply actions to that row. Maybe for every row that is clicked, we want to add a class "active", that changes the color to gray. So it can reduce all that writing to just one event, and writing less code is best 😎 .
NOTE: If you maybe heard about preventDefault() and thought why not use that to stop propagation, well this method is used only for an element that has default behavior, like form, but if we are clicking on div, we don't have any default behavior so we use stopPropagation() to stop propagating.
Event Bubbling
This is the default behavior of events in the modern browser so I'll cover it first. Event Bubbling is behavior that executes all the events from the target to the top of the window, except ones we said that don't propagate (blur, focus, scroll). So if we click on the last child in the document, it will bubble to every parent and execute their events. For example, we click on the table checkbox, which will cause that checkbox to fire an event (if it has any) and then go to checkbox parent and try to fire an event, and then go up the hierarchy one by one and try to execute all the events along the way. We have an animation here showing that behavior:
Animation by Fatima Trtak
As you can see click on the checkbox on the bottom is causing bubbling of events all the way to the top. So if any element had an event, for example, a table, it would fire that one also, and even at Window, it would fire if there are any events. This behavior can be stopped by using stopPropagation(), and the event will be only executed on the checkbox and nowhere else. This can be used if you have a checkbox, and maybe delete or edit on the same row and also an event on the row itself like onClick that opens different views with values from that row. If you don't use stop propagation, it would fire edit and also went to a different view, so that edit would be kinda ignored and useless.
1<div>2 div3 <table>4 <tr>5 <th>table</th>6 </tr>78 <tr>9 <td id="checkbox">10 <input type="checkbox" />11 </td>12 <td>input</td>13 </tr>14 <tr>15 <td id="checkbox">16 <input type="checkbox" />17 </td>18 <td>input</td>19 </tr>20 <tr>21 <td id="checkbox">22 <input type="checkbox" />23 </td>24 <td>input</td>25 </tr>26 </table>27</div>2829<script>30 function clicked() {31 alert(this.tagName);32 }3334 var elems = document.querySelectorAll('div, table, input');35 for (let elem of elems) {36 elem.addEventListener('click', clicked);37 }38</script>
Here is code that you can copy and try for yourself. It quite simple, we have a div and table with rows inside, we also create click events on the div, table, and inputs. We also have an example at the end that you can check to see how this code should look and behave.
Event Capture
This one is quite similar to Bubbling but unlike Bubbling when we click on the checkbox in the row it would go from the top (Window) to that target checkbox, so the event on the checkbox would be fired last instead of first like in Bubbling. This can be useful if you want to notify parents first and then execute children's events. Also, this phase has to be enabled since Bubbling is the default behavior, and we can do this by adding a third property to addEventListener("click", function(e){},true). This value true is a value of useCapture which is false by default. Now that we set it to true we will have to capture behavior in our tree.

Animation by Fatima Trtak
As you can see this is similar to the Bubbling but events are fired the other way around, here is a code snippet same as bubbling but added property for capturing events instead of bubbling:
1<script>2 function clicked() {3 alert(this.tagName);4 }56 var elems = document.querySelectorAll('div, table, input');7 for (let elem of elems) {8 // We added third parameter 'true' to enable capturing9 elem.addEventListener('click', clicked, true);10 }11</script>
Here is also an example of how to stop event bubbling or capturing:
1<script>2 function clicked(e) {3 alert(this.tagName);4 //Prevent event propagation5 e.stopPropagation();6 }78 var elems = document.querySelectorAll('div, table, input');9 for (let elem of elems) {10 elem.addEventListener('click', clicked, true);11 }12</script>
Here is an example you can play with, use toggle to switch from "bubbling" to "capturing" and click on the elements, we have events on the checkbox, table, and div.
| table | |
|---|---|
| input | |
| input | |
| input |
Conclusion
This was an interesting topic to write about, and I hope these events' behavior is clearer now. If you think that this post helped you understand this topic then, please share with others so they can also learn this.